Back to Life: Fixing my eight-year-old MacBook
This is the story of how I turned an eight-year-old laptop into a viable daily driver. Come with me, friend, in this nerd-sniping rabbit hole; this renovating extravaganza fueled by caffeine and acetone vapors.
A little bit of the backstory
As I have mentioned some time before in this blog, before using Linux as my daily driver, I was a macOS user while I was in college. I saved for a very long time to buy the cheapest model to use the photo editing software I wanted without having to use Windows. They were not that popular yet in Spain, and I still remember the weird looks the first time I got to college carrying a laptop with a shiny apple on its back.
It was, funny enough, just before macOS became the apex OS for developers (and, if I recall correctly, it was still called OS X). By the end of my second year, most of my classmates had bought a MacBook. Those were, however, days of changes in what macOS was: Apple swapped felines for rocky formations, and the focus shifted (at least from my point of view) from artistic works like photo or video editing to developers. They were changing what the “Pro” in MacBook Pro meant, and I was all for it.
However, right after graduating, everything started to feel much more constrained. During my last year and master’s degree, I had time to start diving into Linux: learning my grips around the system, understanding its nuances and limitation, and how to customize every part of it. Those were the days of my i3wm and Emacs configuration and fine-tuning everything (spoiler: I already had a bit of a “gotcha” moment regarding that). Suddenly, I felt that now I was the one shifting out from the Pro in MacBook Pro. That was my final cue to invest in a Dell XPS 15 9560, my first vostok machine.
The XPS 15 was, and still is, an absolute powerhouse. It had battery for days in Linux, and dual-booting Windows with its dedicated GPU allowed me to game on it. No joke: I wanted to have both worlds in that single machine and not have a desktop PC, so I used to play video games (demanding ones) on that poor laptop. It was not easy because that was obviously not what it was designed for, so the thermals were far from optimal. I had to tweak the insides with new thermal paste and strategically placed thermal pads, but it was good enough to hit 60 FPS most of the time.
That was roughly five years ago. Now everything looks a bit different: I have a much more powerful CPU, and what I look for in my laptop is just a small, portable machine that allows me to write some basic stuff with a text editor, browse the internet, and overall, being able to do simple things like using Bluetooth devices, printers, or peripherals reliably. The Dell XPS 15 was still heavier than my old laptop, thicker and the battery life in NixOS was not great despite all my tuning 1.
As it turns out, I already had that laptop. That was extactly how I remembered my MacBook Pro. I guess that’s how I remember most of my Apple devices: you cannot do anything too out-of-the-box as easily as in a Linux machine, but they are generally reliable, and the hardware is just incredible. So I decided to give it yet another chance.
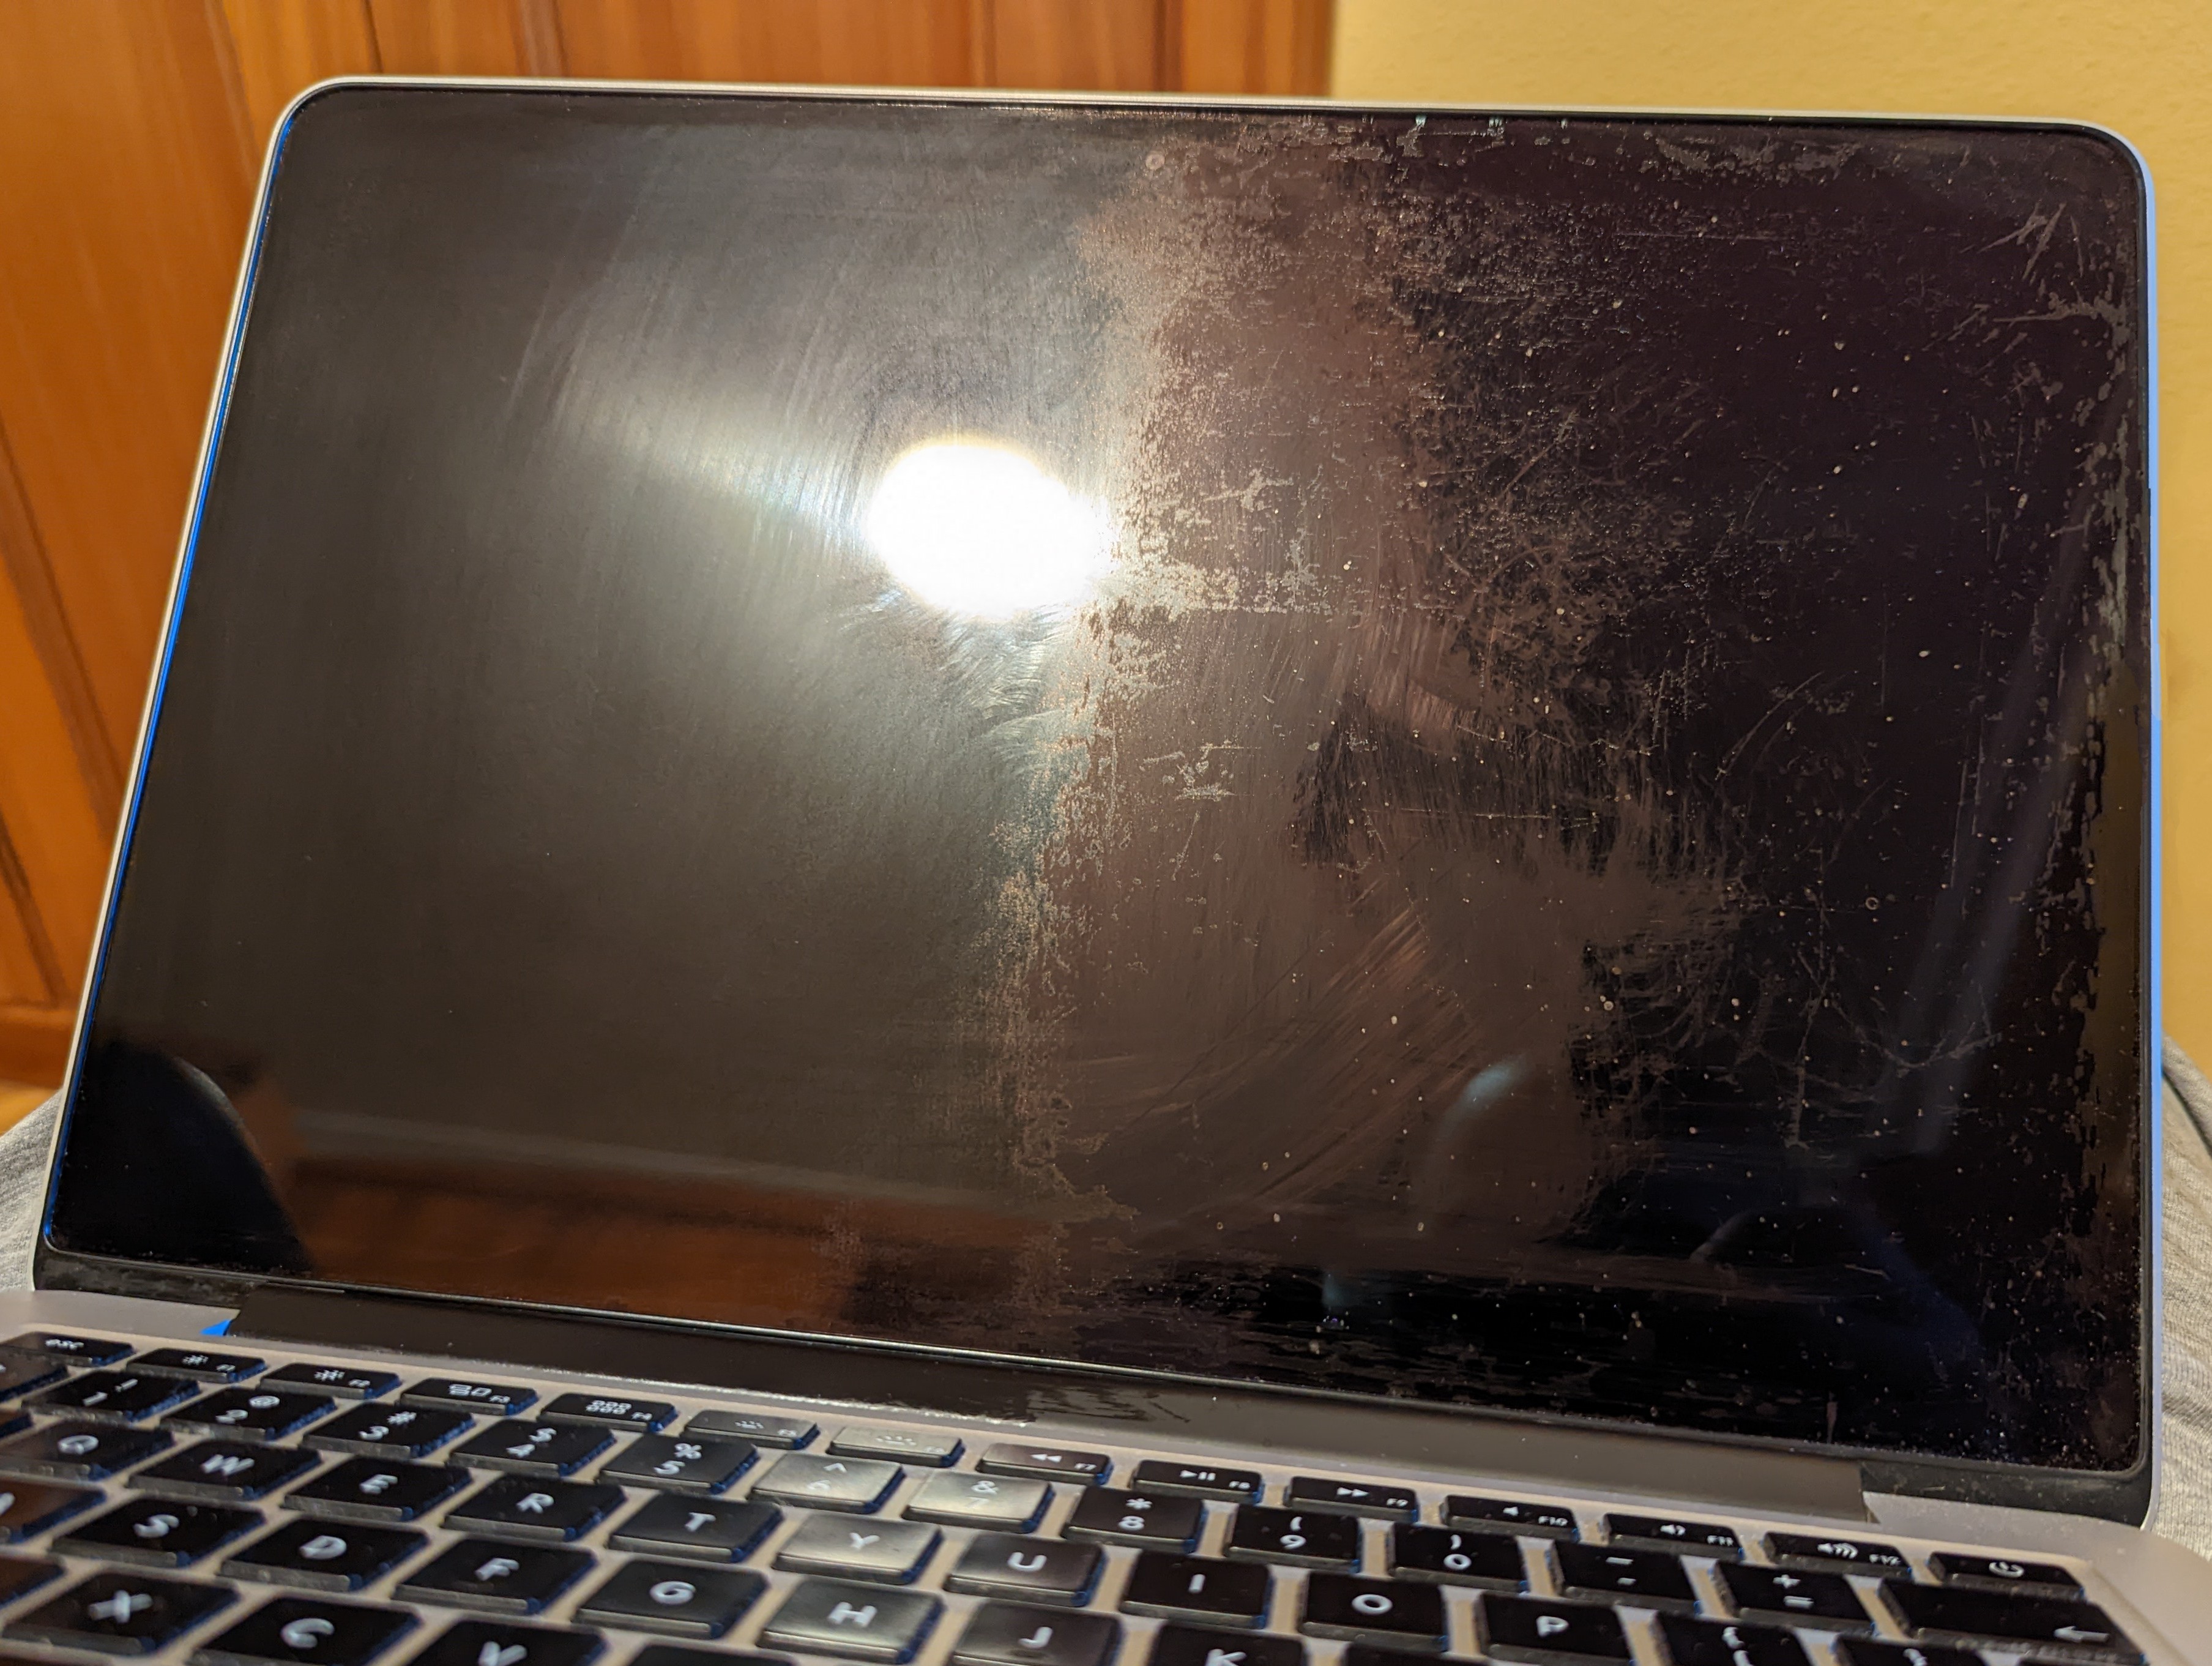
However, there was a catch. I had given my MacBook to my father, who used it for work stuff and eventually retired it because of the terrible battery life it had left and some weird stains on the screen that made the whole laptop unusable. So there was quite a bit of work before having that travel-ready laptop I was hoping for.
Hands dirty: the hardware overhaul
There were two fundamental problems on a hardware level with the MacBook: the battery and the screen. The battery is nothing extraordinary: an eight-year-old lithium battery is due a replacement. Even macOS knew it since there was a tiny warning in the battery section on the menu bar that said: “Condition: Replace Now”. iFixit sells battery replacement kits, so that was covered.
The screen issue was more thrilling. Since I was already going to buy the battery, my first instinct was to buy a replacement screen. That was before looking at the significant price of the kit: $599, no less. It is not an outrageous price, especially for a quality screen. Still, I was uncomfortable with it, especially when factoring in my success probabilities with the battery replacement (more of that later). After a bit of research, I learned that those stains were not an anomaly as I thought: they are referred to as Staingate, and happen when the anti-reflective coating of the Retina Display peels off from the glass. It was a common issue in Retina MacBooks of those years, and Apple covered the screen replacement… As long as the device was bought in the last four years, which was not. However, there are plenty of home remedies for it: iFixit suggests using Listerine, Redditors suggest baking soda or Lysol wipes, but the central idea is to use something able to peel off the faulty coating from the display entirely without damaging the glass. What worked for me was probably the easiest and weirdest: using baby wipes in circular motions on the screen. It was certainly not a brief task, but in roughly fifteen minutes the screen was in a more than acceptable state. For now, I am content with that solution.
Now that the screen issue was out of the way, it was time to replace the battery. Don’t be fooled: even though I could rely on having both an iFixit kit and guide, both of the excellent quality we are used to from the iFixit folks, it was not going to be a walk in the park. The guide describes it to be as difficult as it gets, even though a quick look seems like most of the steps are reasonable. There is a single pain point that makes what could be an easy repair a terrible experience: all six cells of the battery are glued to the aluminum case. That means that have to use a fair amount of force and adhesive remover, which can drip to the trackpad and, if all goes awry, to the screen. The iFixit guide gives a good set of tips, pouring the solvent all over the laptop is still terrifying. Four of the cells rest easily on the case itself; however, the center pair rests on the trackpad tray, which can result in a damaged trackpad when prying (something that you have to do). My tip for these two cells is to spread some of the adhesive remover in the cards or prying tool you are using and use that to spread directly on the glue, instead of pouring it directly. It is going to take longer, but it’s going to be a safer bet. I could see some of the adhesive remover I used under the trackpad tray, which thankfully did not cause any damage, but just because I got lucky. After booting and checking that I had properly installed the battery, I could finally stop holding my breath.
That was probably the most infuriating step because of how unnecessary it seems. I struggle to understand why gluing the battery to the case may be needed, but there may be any integrity or rattling issues that can be solved that way. I’ll concede that point; maybe there is not enough room to use regular screws. But, even if gluing parts is indeed necessary, this is the worst way possible. Some smartphones need to have the battery glued and use adhesives with pull tabs. One of those smartphones is the iPhone 6, which was released mid 2014 by Apple. Gluing the battery (a perishable part) to the case, can only be understood as a way for Apple to make their hardware intentionally difficult to repair.
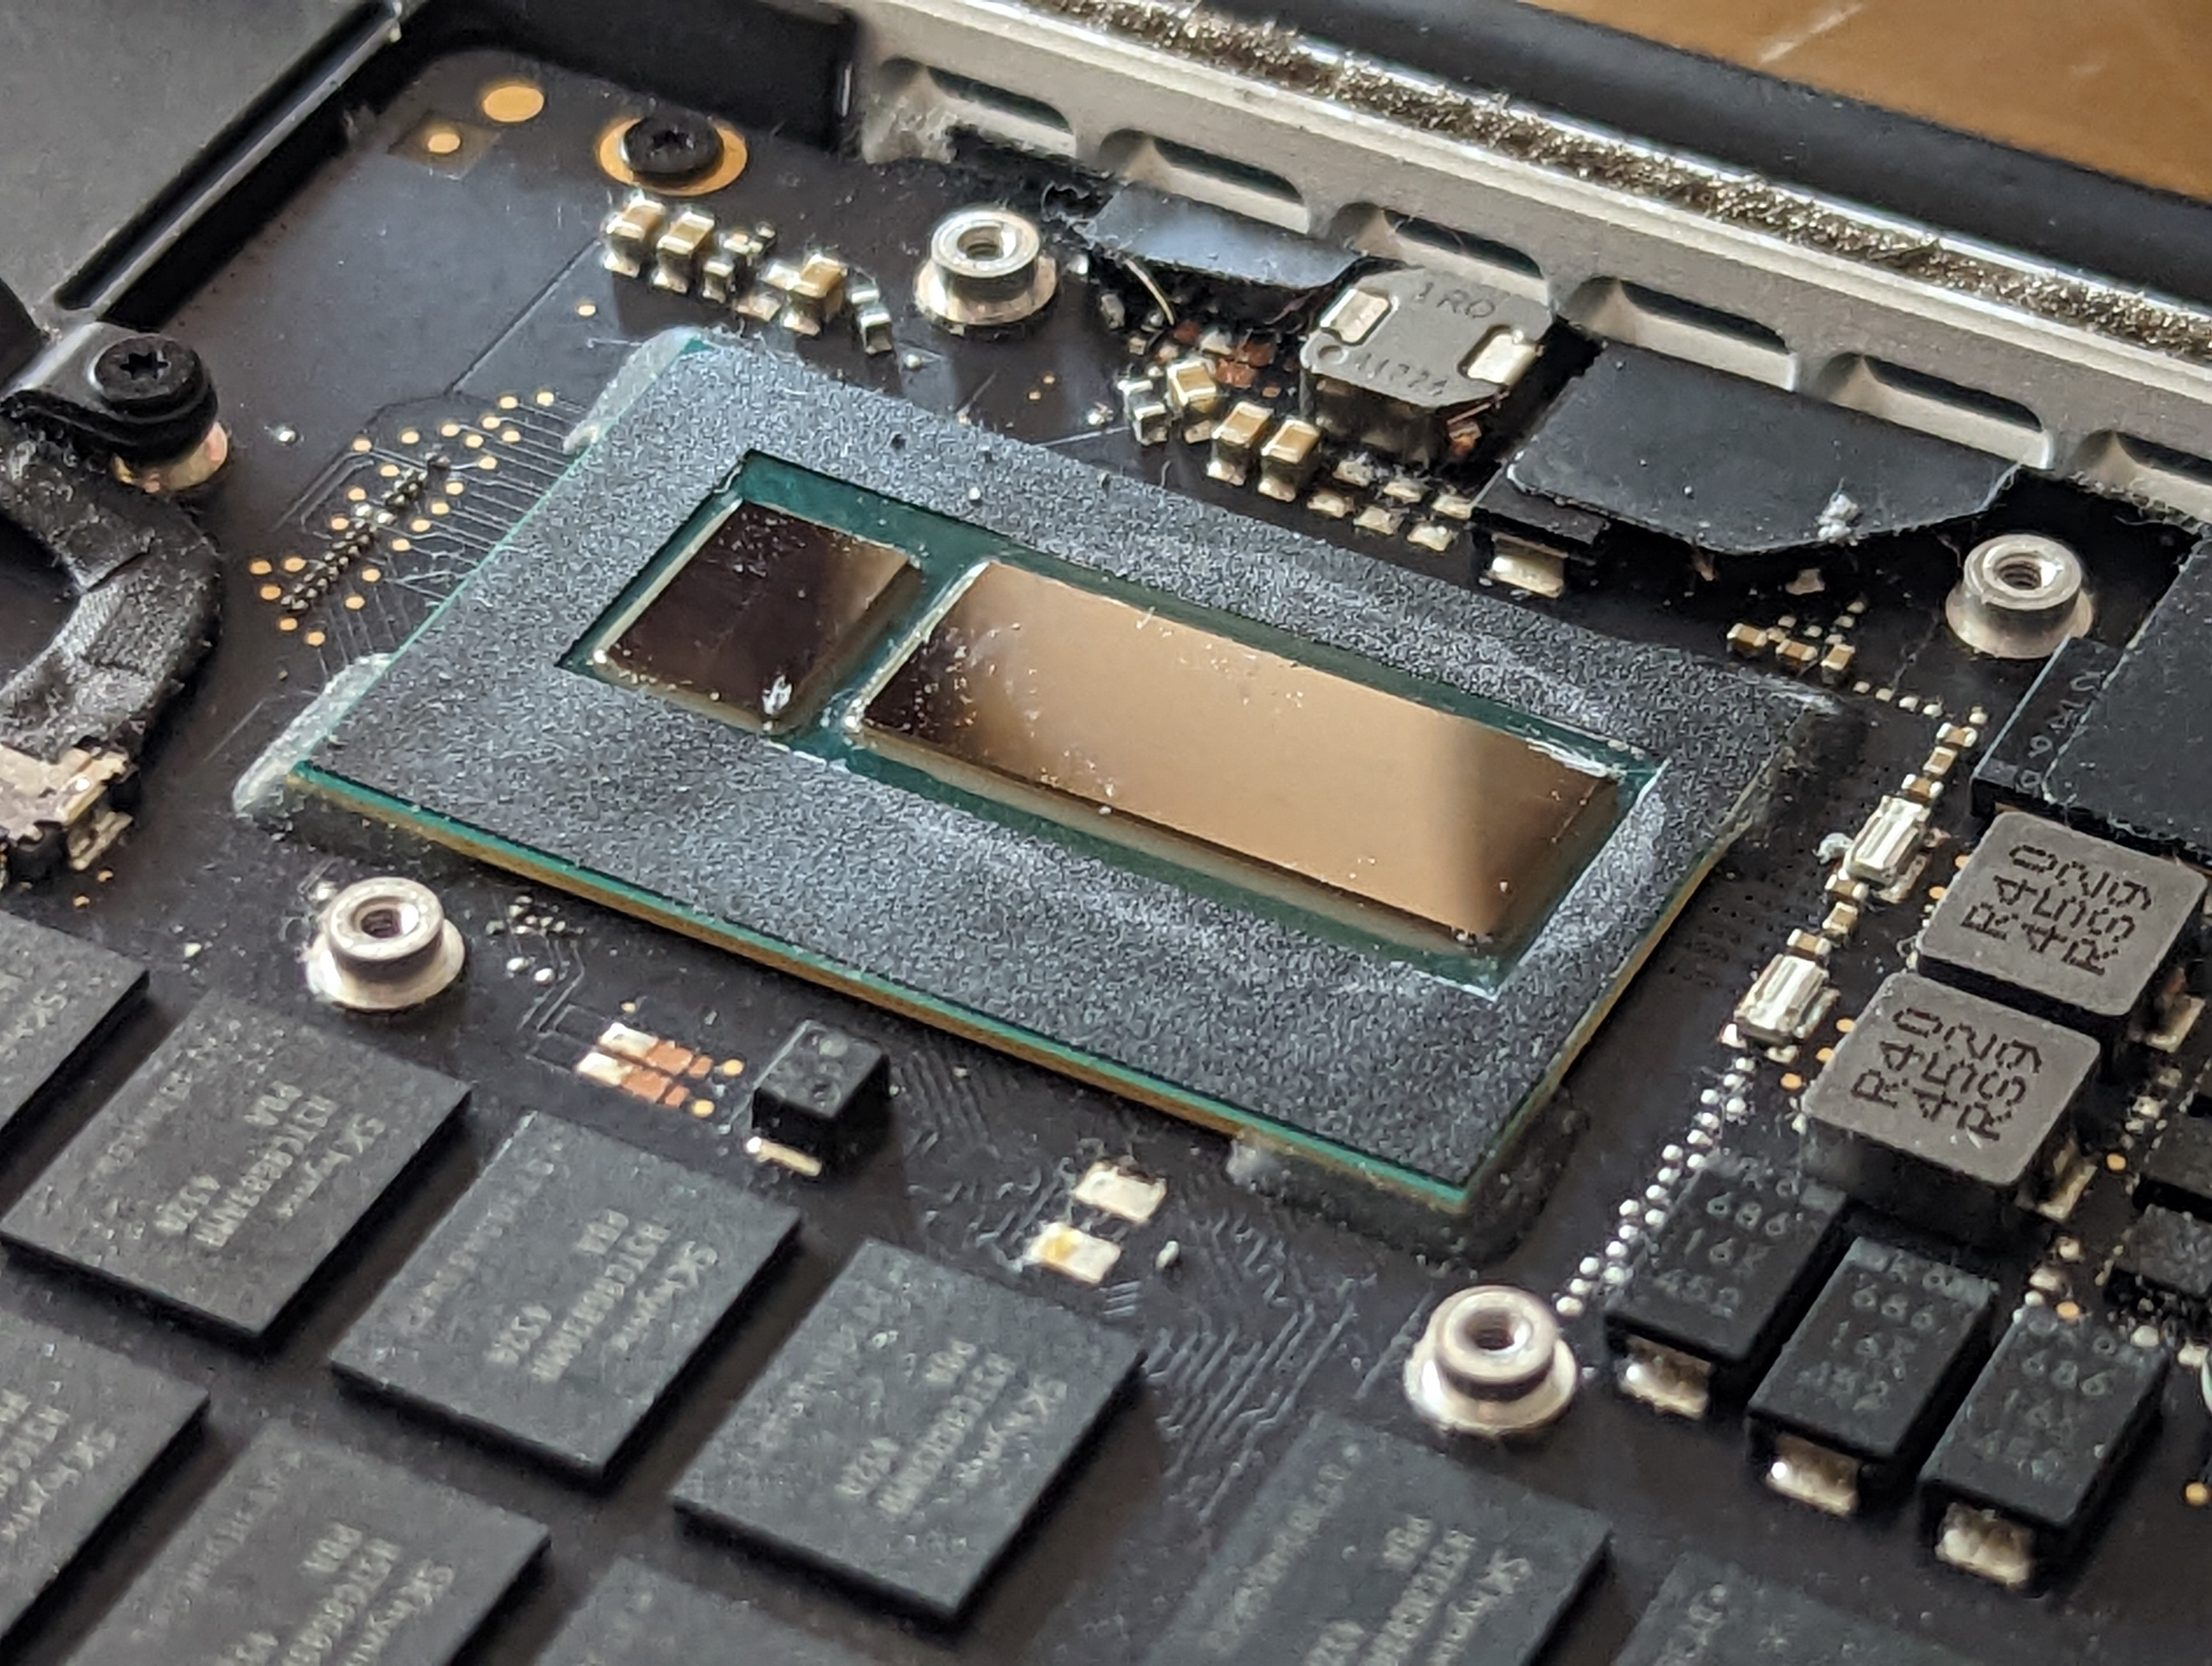
Now with the main issues out of the way, I could also do some essential maintenance: cleaning the horrendous amounts of dust in the fan and radiator and removing and reapplying the thermal paste. The thermal paste was adequately installed (unlike the grotesque factory job I found in my Dell XPS 15), but a fresh coat on the CPU was long overdue after all those years. After all this, the MacBook was ready for the next step: tuning the software just as we tuned the hardware.
I won’t do what you tell me: the software overhaul
Before tuning anything, I checked how the overall system worked, and it was… Let’s say, far from what I expected. The specs were not dated at all, but the device felt sluggish. I assumed that it was due to my father’s complete disregard for basic maintenance or common sense while using computers and having around 15 startup applications; that and sensitive information all over the place required a comprehensive disk wipe.
In one of those checks, I realized that the version installed was macOS Big Sur (11), while the last one available was Monterey (12). That was interesting since updating an Apple system is usually painless enough for my father to do. It was, actually, Apple’s decision: the last supported version for the MacBook was Big Sur. The real shock came when I saw the features that Monterey added and that, supposedly, made my system seemingly unsupported: a new look for notifications? Tags in the note app? Maps interactive globe? I was fairly sure that my device would not halt and catch fire because of that.
After some research, I found that I was right: plenty of people were running unsupported macOS versions with no issues. To do so, they were using different utilities to spoof the model string of their computers while installing or updating macOS, mimicking that of a supported device. The one I chose was OpenCore Legacy Patcher, which provides a compatibility matrix showing macOS Monterey can be installed without issues in MacBooks from as early as 2012; or 2008 if you are OK with some experimental hardware acceleration.
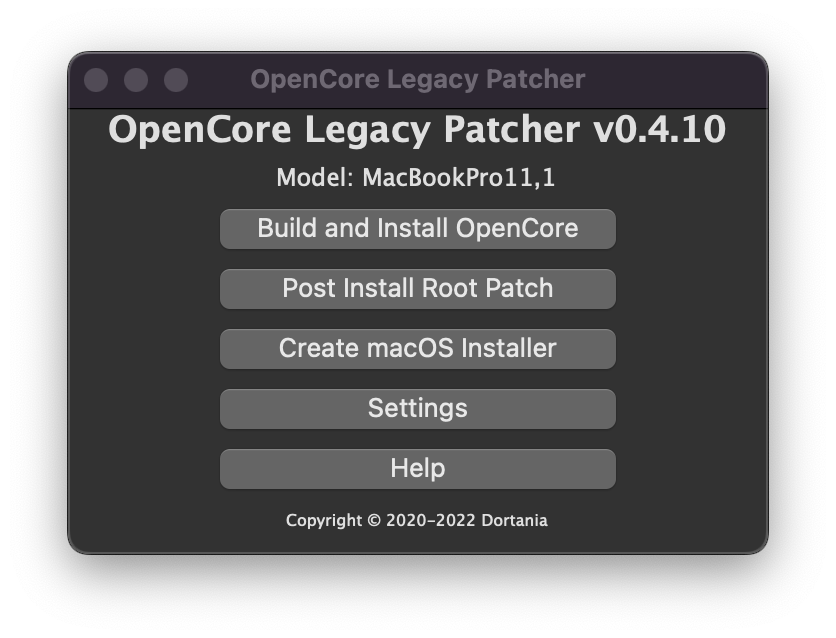
The process to install Monterey (or any other macOS version) using OpenCore Legacy Patcher is pretty straightforward: create an installation media USB, patch it, boot from it, install it, boot from the new installation, patch the EFI device. It could be a bit tedious (finding the installer, creating the media), but OpenCore Legacy Patcher is hands down one of the best utilities I have ever used. It’s not super pretty, but it is really good at what it should do. Almost every last step of the process can be done from within the tiny GUI app, including downloading official macOS installers and creating the installation media.
After a painless process, my MacBook was finally running a fresh macOS Monterey installation. Everything works out of the box without a single hiccup, and the only issue I had was that Nix is not compatible with FileVault installations. Everything else I needed works smoothly, and the battery seems to last anywhere from 8 to 10 hours. I have actually written this post entirely from the MacBook, so I would say that the renovation is completed, and this device is ready for some real life action.
Full disclosure, I do not think that is NixOS fault; instead, I guess Gnome 42’s power manager is not great at its job. ↩︎